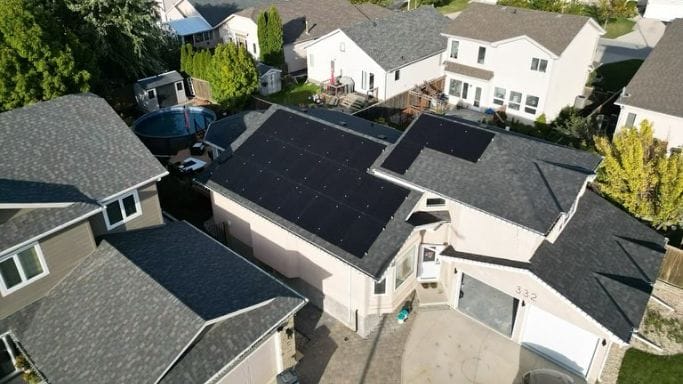
Steps to Prepare Your Home for Installation
Roof Inspection and Evaluation
First, your roof is the most important factor in getting the most out of your solar PV systems. Monocrystalline solar panels are designed to last at least 25 years, so ask yourself—is it in good enough shape to last just as long?Condition
Roofing materials matter. According to the Canadian Home Builders’ Association, homes with roof decks under five years old are ideal.- Asphalt shingle roofs are common and compatible with clean power, but installation can be tricky if you have clay tiles or green ones.
- A roofer can assess the condition, look for structural weaknesses, and determine if repairs are needed.
Orientation and Tilt
In the Northern Hemisphere, panels prefer to face south, where they’ll catch maximum sunlight exposure. However, east—and west-facing roofs can still generate energy with the right equipment. If your covering is flatter than Saskatchewan’s, consider using mounting brackets to get the right angle.Shade Analysis
Shadows are the sworn enemy of modules. Even a small shading on one part can cut the energy output.- Some studies indicate that 10% shading can reduce output by 30% or more due to cells’ interlinked nature.
- Use tools or consult your installer for a shading analysis.
Electrical System Compatibility
Homes need a 200-amp service panel to handle the additional load from a system, especially if you plan to add storage batteries. If you’ve got an older 100-amp panel, it may not be equipped to handle the surge. About 30% of Canadian homes over 25 years old may need an electrical panel upgrade to go ready.Wiring Requirements
Installations often require specific types of wiring (10 AWG or thicker) to handle the current safely. Conduit installation may be necessary to protect wiring from the elements if it’s exposed. Some electrical modules must be rewired to accommodate input, so an electrician will likely assess whether your setup needs an upgrade.Let’s Get Your Property Ready for Installing Solar Panels
Prepping Your Covering
| Space and Layout | Natural Resources Canada suggests a minimum of 3.7 m x 3.0 m (12’ x 10’) of clear, unobstructed space for the panels. This area should be free of chimneys, skylights, and vents—anything that might shade or interfere with placement. |
| Orientation and Azimuth | For optimal power, as you install solar panels, they should face between 90º and 270º azimuth from the true north (east to the west range). This harnesses the sun’s daily arc across the sky. If it is slightly off-angled, you can use tilt mounts to adjust. |
| Pitch (Slope) | The ideal pitch falls between 23º to 56º (or a 5/12 to 18/12 ratio). This allows snow to slide off while ensuring maximum exposure throughout the year. This pitch might need adjusting if you’re in a flatter area, like Manitoba. |
Installing Conduits
PV Conduit
To comply with the Canadian Electrical Code Part 1, you’ll need a 2.5 cm (1”) diameter conduit that connects from an accessible area down to your designated PV electrical hardware location (in the mechanical room).- Material like rigid metal or PVC should be durable, and the path should be as straight as possible.
- Although a few bends and elbows are fine, you want to avoid sharp turns that can cause future maintenance.
SDHW Conduits
SDHW systems need slightly larger conduits than PV ones to carry piping for water.- NRC recommends at least two 7.6 cm (3”) conduits (or a single 10.2 cm (4”) conduit) capable of withstanding high temperatures (e.g., PVC certified to ASTM D1785 standards).
- These should run straight and within the envelope to avoid attic temperature swings that could degrade the system over time.
- If the conduit runs through an attic, installing a protective sleeve can prevent overheating from insulation contact.
Capping, Sealing, and Safety
Attic Termination
Conduits should end 15.2 cm (6”) above the insulation and have around 45.7 cm (18”) of vertical clearance between the end and the deck. This allows easy access for future work while preserving your home’s fire and insulation ratings.Roof Termination
If you don’t have an attic (e.g., with a cathedral ceiling), conduits must exit directly through the covering. In this case, they should be fitted with a rubber or corrosion-resistant metal flange for airtight and watertight sealing.Mechanical Room Termination
This room should have dedicated space for both PV and SDHW conduits, with clearance around each termination. For PV, leave 5 cm (2”) of vertical space; for SDHW, 10.2 cm (4”) above and 30.5 cm (12”) of horizontal clearance is ideal.Plumbing Connections for SDHW
If you’re installing an SDHW system, you’ll need to get your water heater ready. This involves setting up two copper “tee” connections on the cold-water inlet line of your water heater, with ball valves that allow easy shut-off when it’s time to connect it. These ball valves should remain closed and capped until a future connection is needed as you evaluate the solar panels’ cost.Mechanical Room Requirements
- You’ll need 91.4 cm x 91.4 cm (36” x 36”) of clear floor space in this room to house your future SDHW storage tank.
- With a clearance height of 182.9 cm (72”) and a design load capable of supporting 453.6 kg (1000 lb), this space should be close to your current water heater but away from any emergency exits, doorways, or areas where it might impede access to other equipment.
- For additional components, allocate another 91.4 cm x 91.4 cm on the wall for the inverter, pump, and other solar panel system controls.
Electrical Outlets
Your SDHW system will need a 110-volt standard outlet within 182.9 cm (72”) of the allocated tank area. While a dedicated circuit isn’t required, an accessible outlet ensures easy power for your controller and other monitoring equipment.
Let the Sun Shine In
And there you have it—a prepped home, primed to harness the sun’s power and turn it into clean, renewable energy. By preparing your property according to these, you’re setting the stage for an efficient, cost-effective installation of a solar system. Our team ensures every rooftop, attic, and conduit runs like a well-sunlight-powered machine. Whether you’re aligning your roof at the optimal 90º to 270º azimuth or spacing out SDHW with a clearance to avoid overheating, our team will guide you through every detail, even about the cost of solar panels. Contact MAG Solar to kickstart reducing your electricity bills. Don’t let roof space, conduit alignment, or storage requirements hold you back from tapping into the sun’s power. The sky’s the limit—and the sun’s the fuel.Frequently Asked Questions
Are there considerations for wind load on a roof?
Yes, panels should be mounted using wind-resistant racking systems, and it’s best to avoid placing them near roof edges, where wind exposure is greatest, to save on energy bills.
A properly prepared roof should withstand loads of up to 240 km/h (common for most racking systems), but this depends on local building codes and the area’s wind exposure rating.
How can I prevent wildlife from interfering with my system?
Birds and rodents can sometimes nest under modules, damaging wiring and reducing efficiency. Installing protective netting or critter guards around them prevents this issue.
This proactive step is easier to incorporate in a home, as future panels can be fitted with protective features during installation without impacting conduit paths or electrical connections.
How does a panel snow load capacity relate to the guidelines?
Panels must be mounted securely in snow-prone regions to handle the extra weight from accumulation. They are designed to support loads in the range of 300-700 kg per square meter, depending on the manufacturer.
When preparing a roof, ensure the structure can handle this additional load, especially in snowier provinces, by reinforcing as needed and adhering to the recommended pitches to facilitate natural shedding.
What happens if I don’t prepare my home according to these guidelines?
While it’s possible to retrofit a home for later, failing to follow these can lead to higher installation costs, more complex wiring, and placement limitations. Installers may make costly modifications, such as additional wiring or roof work, without proper roof orientation, pitch, or conduit paths to accommodate energy production and energy savings.
Adhering to these guidelines now streamlines future upgrades, saving time and money and ensuring the best energy yield.

